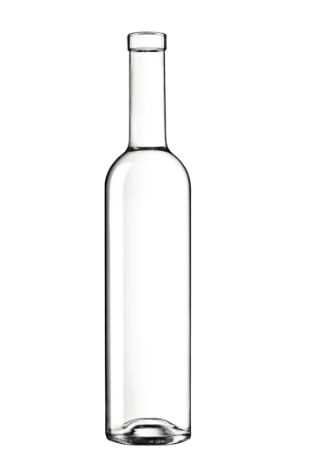
Have you ever wanted to turn a Glass Bottle into a beautiful vase? Cutting a glass bottle may seem tricky or dangerous. Learning the right steps keeps edges clean and safe. In this guide, you will learn how to cut a glass bottle. We cover tools, techniques, and safety tips for perfect results.
Preparing Your Glass Bottle for Cutting
Choosing the Right Glass Bottle
Not all bottles are ideal. Wine bottles, soda bottles, and other smooth, cylindrical bottles work best. Avoid thick or irregular shapes, as they may crack unpredictably. Colored glass adds aesthetic appeal but can make cracks harder to see.
Cleaning and Prepping
Remove labels and adhesives. Any dirt or grease interferes with the cutting process. Rinse the bottle thoroughly and let it dry completely.
Safety Precautions
Always wear cut-resistant gloves and safety goggles. Ensure your workspace is stable, clean, and free of clutter. Glass can shatter suddenly, so maintain control over the bottle at all times.
Selecting the Right Tools
Essential tools include a glass cutter, bottle cutting rig, or DIY scoring tool. Optional accessories: sandpaper, ice bath, and a hot water source. Kits simplify the process and provide consistent results.
Tips: Invest in high-quality glass cutters to reduce breakage and improve efficiency.

Marking and Scoring Your Glass Bottle
Measuring and Marking
Determine the cut height based on your project—drinking glass, vase, or decor. Use a marker or tape to create a visible guideline around the bottle.
Scoring the Glass Bottle
Score lightly and evenly around the mark. Excessive pressure may break the bottle. Aim for a single pass for a clean start.
Common Scoring Mistakes
Avoid multiple passes or uneven pressure, which can cause jagged edges. Check the score line for consistency before moving on.
Tips: Uneven scoring is a leading cause of bottle cracking during the cutting phase.
Using Temperature to Cut the Glass Bottle
Hot Water Method
Heat water to near boiling. Slowly pour it along the score line while turning the bottle. The heat encourages the crack to form along the intended path.
Cold Shock / Ice Water Technique
Immediately submerge the bottle in cold water or ice bath. Alternating hot and cold cycles triggers a controlled separation along the score.
Controlling the Crack
Guide the crack carefully. Apply heat ahead of the crack and avoid forcing the bottle. If the crack stalls, repeat the cycle or adjust heat distribution. Consistent temperature cycles reduce stray cracks and improve cut accuracy.
Separating and Handling the Cut Bottle
Removing the Bottle Halves Safely
Once the crack completes, gently separate the halves. Avoid excessive force to prevent splintering.
Checking for Imperfections
Inspect for jagged edges or uneven breaks. Minor imperfections can be corrected during sanding.
Best Practices for Repeatability
Practice on a few bottles first. Standardize bottle types and cutting height for consistent results. Using the same bottle type ensures predictable cracking behavior.
Smoothing and Finishing Edges
Sanding Techniques
Wet sandpaper works best. Rub the cut edges under water to remove sharpness and reduce glass dust. Continue until the edge is frosted smooth.
Safety During Sanding
Glass dust can irritate lungs and skin. Always sand under water and wear gloves. Dispose of glass particles carefully.
Optional Polishing or Decorating
Paint, varnish, or seal edges for aesthetic appeal. This step is optional but adds safety and visual quality. Wet sanding improves durability and prevents accidental cuts.
Tools and Kits for Glass Bottle Cutting
DIY Bottle Cutter Kits
Kits provide adjustable scoring rigs, gloves, and sandpaper. They simplify setup and improve cut consistency.
Comparing Manual vs. Electric Cutters
Manual cutters are affordable and portable but require skill. Electric cutters provide precision and speed but cost more.
Accessory Tools
Additional tools include ice water bowls, measuring cups for hot water, and markers for accurate scoring. Proper accessories enhance workflow and reduce mistakes.
Creative Uses for Cut Glass Bottles
Drinking Glasses and Tumblers
Uniform bottles produce matching glasses. Ideal for personal use or gifts.
Vases and Planters
Wider bottles are perfect for decorative vases. Paint or decorate for unique designs.
Craft Projects and Gifts
Small bottles can become candle holders or painted art pieces. Recycled bottles add eco-friendly value. Cut bottles can be monetized in small craft businesses or DIY workshops.
Conclusion
Glass Bottle cutting requires patience, proper tools, and careful technique. Preparing and scoring the bottle correctly ensures clean breaks. Safety with gloves and goggles is essential. Sanding smooths edges, and creative finishing adds style. HYGLASS products provide reliable tools and kits that make cutting safe and efficient.
Table:Glass Bottle Cutting Overview
| Step | Action | Tools Needed | Safety Tip |
| 1 | Clean & prep | Bottle, marker, soap | Wear gloves |
| 2 | Score | Glass cutter | Apply light pressure |
| 3 | Heat | Boiling water | Avoid pouring directly |
| 4 | Cold shock | Ice water | Handle carefully |
| 5 | Separate | Hands | Use slow force |
| 6 | Sand | Wet sandpaper | Reduce glass dust |
| 7 | Decorate | Paint/varnish | Optional but safer |
Tips: Following each step sequentially increases success rate and reduces bottle waste.
FAQ
Q: What is a Glass Bottle cutter?
A: A Glass Bottle cutter is a tool that helps you score and cut bottles safely.
Q: How do I cut a glass bottle at home?
A: To learn how to cut a glass bottle, score it evenly, use hot and cold water cycles, and sand the edges carefully.
Q: Why do bottles crack unevenly?
A: Uneven cracks happen if the score line is inconsistent or temperature cycles are rushed.